Table of Contents
1. Lesson 01: Getting started with Tic-80
1.1. Creating your project
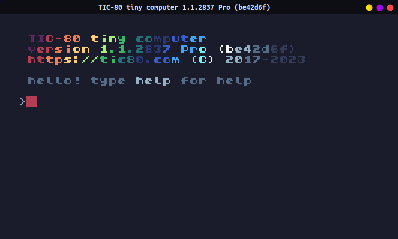
When Tic-80 first boots, it will show a prompt - a location where
you can type text out. We are going to start by creating a new
project, and saving it. Make sure to save your program as
YOURNAME1.LUA, replacing "YOURNAME" with your first
name.
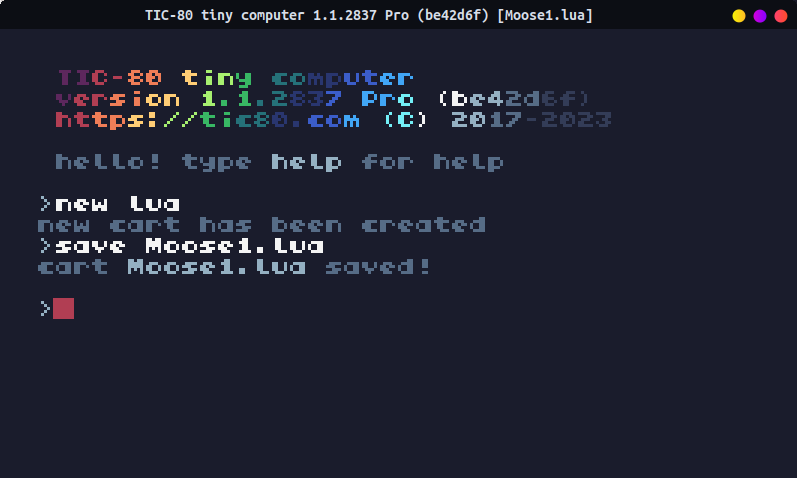
> new lua
new cart has been created

> save Moose1.lua
cart Moose1.lua saved!
\newpage
1.2. Adding the starter code
Once saved, we can start editing our first program. Press the ESCAPE key on the keyboard, which will then take us to the code editor.
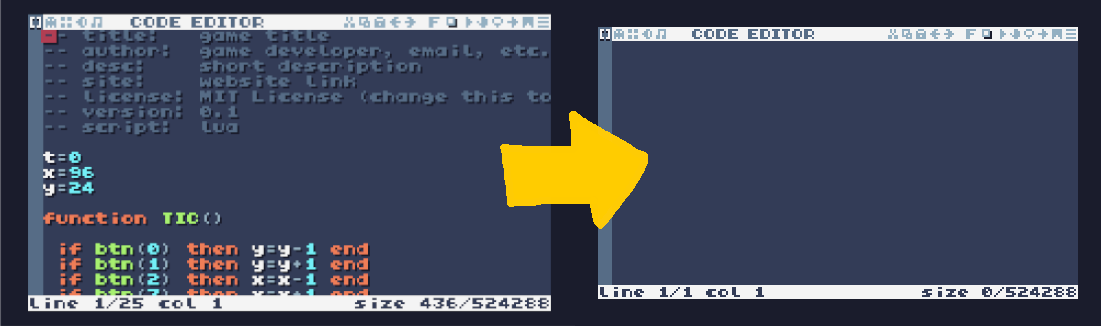
It begins with some starter code, but we don't need it. You can erase what is already there by SELECTING ALL with CTRL+A on your keyboard (or use the mouse to click-and-drag along all the text), then pressing BACKSPACE to erase it.
\vspace{0.5cm}
We're going to start with the following code. You can highlight it by clicking-and-dragging with the mouse, and COPY with either CTRL+C or right-click -> copy. In the Tic-80 code editor, you can PASTE the code in using CTRL+V or click the PASTE icon.
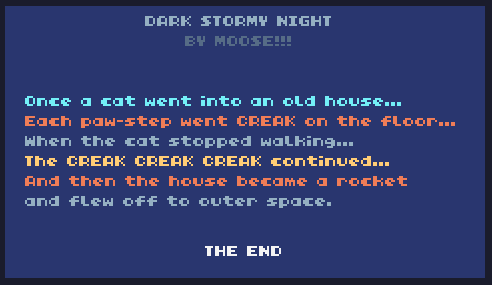
function TIC()
 cls( 12 )
 print("There was once a", 0, 0,  2)
 print("cat named Luna",   0, 5,  3)
 print("that bit noses.",  0, 10, 4)
 print("One day...",       0, 20, 5)
 print("She accidentally", 0, 25, 6)
 print("ate a booger!",    0, 30, 7)
 print("The End",          0, 40, 8)
end
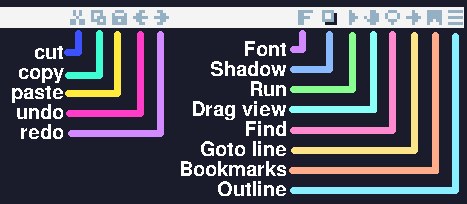
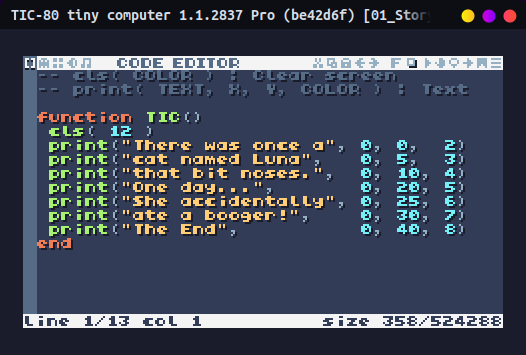
Once pasted in, RUN the program by hitting CTRL+R or pressing the RUN icon.
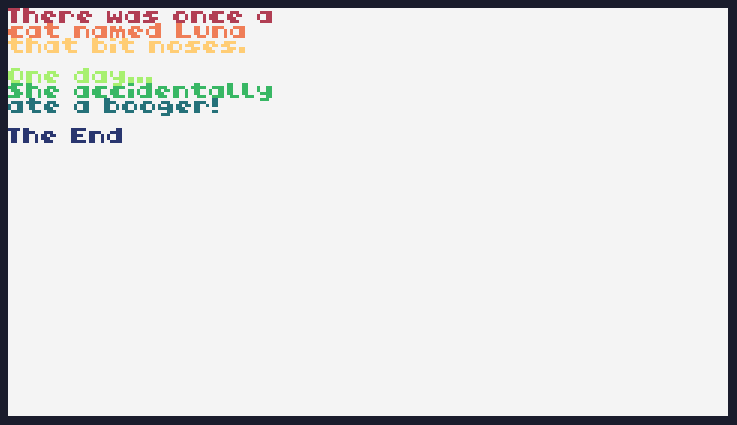
The program will run and display a little story. Now we're going to start customizing it!
Once you're done running a program, press the ESCAPE key again. This will open up the game menu.
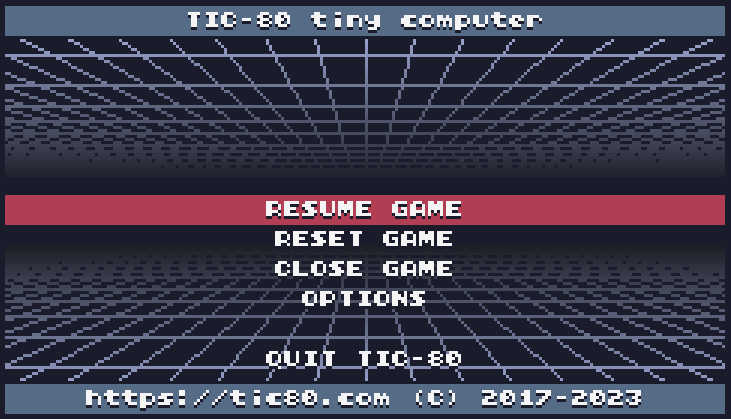
From here, you can press the F1 button on your keyboard to go back to the code editor, or choose the CLOSE GAME menu option to go back to the prompt view.
1.3. Customizing the story!
We're starting off simple, so we're just going to use the print command to display text to the screen, and cls to clear the screen. All our code should go after function TIC() and before end, which is the end of our program loop.
cls( color )https://github.com/nesbox/TIC-80/wiki/cls
The
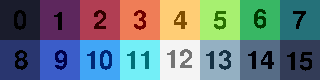
clscommand clears the screen - this should go BEFORE you print out any text.The numbers 0 through 15 have numbers assigned to them, so you can type in a different number to change your text color.
print( text, x, y, color )https://github.com/nesbox/TIC-80/wiki/print
You can use the
printcommand to display text to the screen. Inside the parentheses ( ) we put…text, which needs to go inside double quotes, like:
"The quick brown fox"Then a comma , before the next item.
Next we put an
xand aycoordinate. This is where our text will appear on the screen. Play around with some different values to see what you get!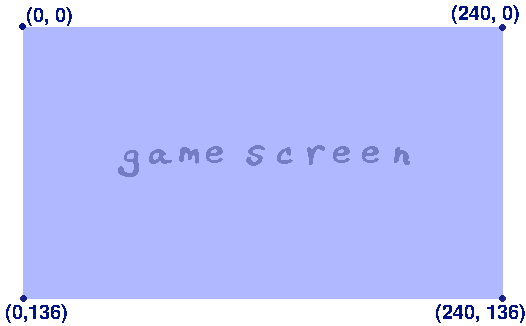
The top-left of the screen is at x = 0, y = 0. The bottom-right of the screen is at x = 240, y = 136.
So you can set the x value to anywhere between 0 and 240, and the y value to anywhere between 0 and 136.
- The last part is the COLOR. Use one of the numbers 0 through 15 to set the text's color.
Customize your story by changing up what's written, the (x,y) coordinates of the text, and the colors! Then we will show off our work. Remember to use the RUN button or CTRL+R to start the program, and ESC then F1 to go back to the code editor!
1.4. Backing up your work!
Once your story project is completed, let's save a backup of your work!
- You can take a SCREENSHOT of your Tic80 program running by pressing the F8 key on your keyboard!
- Press ESC and select CLOSE GAME to go back to the PROMPT.
- Make sure to type SAVE or hit CTRL+S to save your work.
- Type FOLDER to open up the folder with your game!
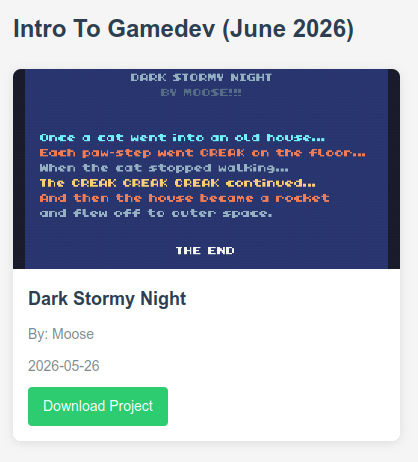
On the web, go to the STUDENT GALLERY:
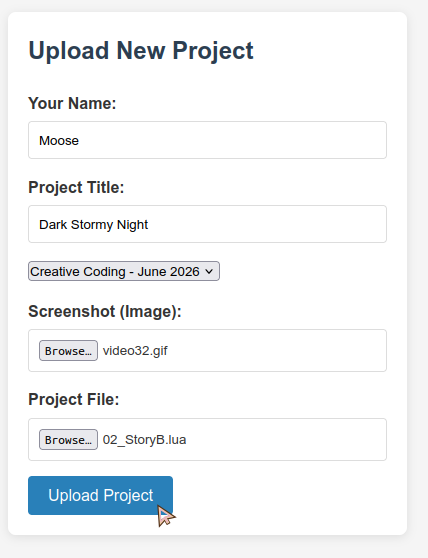
- Fill out the following:
- Set Your Name (first name only or nick-name!).
- Set your Project Title.
- Click-and-drag your screenshot (e.g., "video01.gif") into the "browse" box under Screenshot.
- Click-and-drag your game file (e.g., "MOOSE1.LUA") into the "browse" box under Project File.
- Press Upload Project once done.
Your project will then be saved, and you can download it later!