Getting Started with Game Development, Summer 2026
Table of Contents
- TIC80 Quick Reference
- Lessons
- How to…
- 🧽 How do I clear the screen?
- 💬 How do I print text to the screen?
- ✏️ How do I draw images on the screen?
- 🖱️ How do I detect mouse clicks and mouse position?
- 🎲 How do I make random things happen?
- 🔊 How do I play sound effects?
- 🔘 How do I detect button presses?
- 📐 How do I determine how far from each other two things are?
- ➡️ How do I get my character to move when arrow keys are hit?
- 🏃 How do I make an NPC move on its own?
- 🏓 How do I check if two items are hitting each other?
- 🌌 How do I make a background / a game level?
- ⏳ How do I make a countdown timer?
- 🔥 How do I shoot one projectile?
- 🗺️ How do I make the map scroll?
- ↩️ How do I make my character turn when moving?
- 🎬 How do I animate my sprites?
- 🐘 How do I make big sprites?
- 👾👾 How do I handle multiple enemies?
- 💣💣 How do I shoot multiple projectiles?
- 🪄 How do I create spot-warps to other rooms?
- ⛔ How do I disallow the player from moving into certain tiles?
- 💣🧙 How do I deal with collision between a projectile and an object?
- Additional code - Enemies and Warp systems
- Surf: Exploring Games on Tic-80
- Teacher/parent resources
Course written and taught by R.W. "Moose 🫎" Singh
TIC80 Quick Reference
How to start a new project
- Open TIC80
- Type
new luaand press enter - Type
save GAMENAMEto save your game
Then, press CTRL+S periodically to save your work!
How to load your work from your flash drive
- Open TIC80
- Type
folderand press enter - Plug in your USB drive
- Open the USB drive folder
- Click-and-drag your files from the USB drive to the TIC80 folder
- In TIC80, type
load FILENAMEto load your work
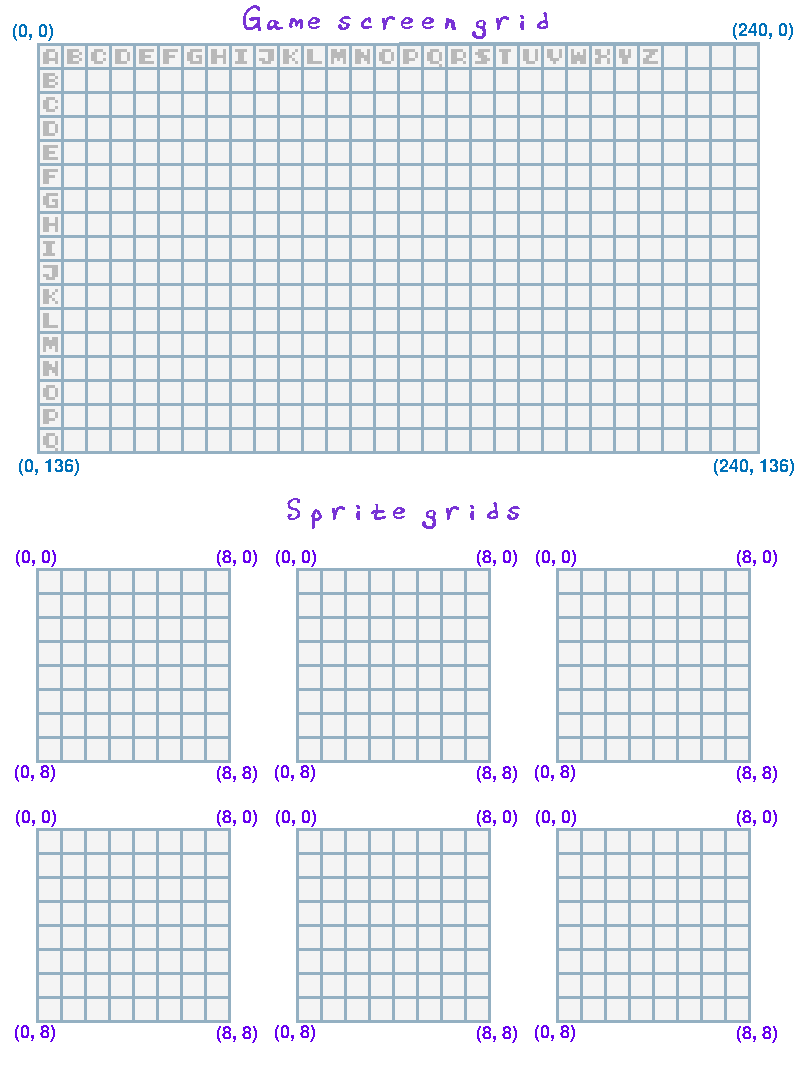
Dimensions reference
- Sprite/tile dimensions: 8 x 8 pixels
- Screen dimensions: 240 x 136 pixels
- Map dimensions: 30 x 17 tiles (that's 30*8 x 17*8 pixels!)
Color reference
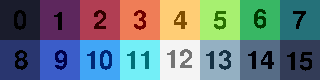
| 0 | 1 | 2 | 3 | 4 | 5 | 6 | 7 |
| BLACK | PURPLE | RED | ORANGE | YELLOW | LGREEN | GREEN | DGREEN |
| 8 | 9 | 10 | 11 | 12 | 13 | 14 | 15 |
| DBLUE | BLUE | LBLUE | SKYBLUE | WHITE | GRAY | DGRAY | ALMOST BLACK |
If you have TIC80 PRO you can change this palette to any colors you'd like.
Button reference
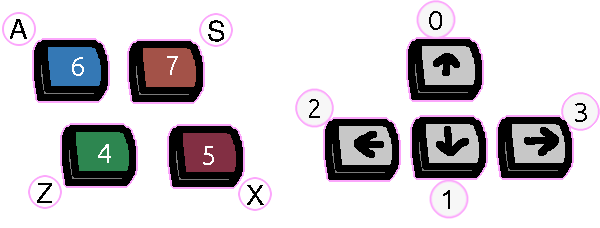
| 0 | 1 | 2 | 3 | 4 | 5 | 6 | 7 |
| UP | DOWN | LEFT | RIGHT | Z | X | A | S |
You can remap the buttons in the TIC80 menu by pressing ESC while running the game and going to Options and Setup Gamepad.
Keyboard shortcuts
| F1 | F2 | F3 | F4 | F5 |
| Code editor | Sprite editor | Map editor | Sfx editor | Music editor |
| CTRL+S | CTRL+L | CTRL+R | ESC | CTRL+C | CTRL+X | CTRL+V |
| Save | Load | Run | Editor/Prompt | Copy | Cut | Paste |
| or game menu |
Tools icons
CODE EDITOR
| CUT | COPY | PASTE | UNDO | REDO | FONT |
| SHADOW | RUN | DRAG | FIND | GOTO | BOOKMARK | OUTLINE |
SPRITE EDITOR
| PENCIL | DROPPER | SELECT | FILL | FLIP H |
| FLIP V | ROTATE | DELETE | TILES | SPRITES |
MAP EDITOR
| VIEW ALL | TOGGLE GRID | SELECT | FILL | CHOOSE TILE |
Lua operators
- Arithmetic: + (Addition), - (Subtraction), * (Multiplication), / (Division)
- Assign x the value of 123: x = 123 (one equal sign for variable ASSIGNMENT)
- Relational operators:
- x equals y: x == y
- x is greater than y: x > y; x is less than y: x < y
- x is greater than or equal to y: x >= y; x is less than or equal to y: x <= y
- x is NOT equal to y: x ~= y
- Modifying a variable's value: x = x + 1, x = x - 1
- Logic operators: and, or
- Concatenate: ..
Advanced tools
If you have TIC80 PRO ($10 on their page) you can save your TIC80 project as a .lua file and use a proper code editor to work on your code more easily.
- Geany (free/open source code editor)
Lessons
Thinking about Computer Graphics
Ahead-of-time constraints
To keep the code simple, there are some constraints I recommend.
Keep character images ONE TILE (8x8 pixels) in size


WHY? The more tiles a character takes, you will need a
sprcall for each one, and need to handle the (x,y) offsets.Code for the big sprite:
spr( 94,  x-4, y-4, 0 )
spr( 95,  x+4, y-4, 0 )
spr( 110, x-4, y+4, 0 )
spr( 111, x+4, y+4, 0 )
vs. for the small sprite:
spr( 94, x, y, 0 )
PLUS the alrger sprite makes it harder to code in COLLISION DETECTION and other things! And if all your characters are different sizes this FURTHER complicates things!
Don't design a platformer, make it top-down
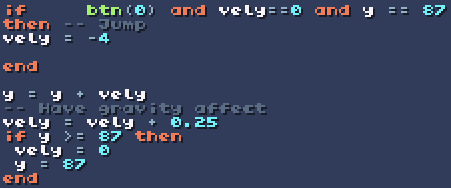
WHY? Implementing gravity means adding in physics calculations, like momentum, as well as collision detection for the ground. If you have a consistent flat ground at a specific y coordinate then that's a little easier, but any sort of tile-based platforming plus gravity will be greatly over-complicated.
Numbers are easier than health bars or hearts
Storing "hp" and printing the hp as a number value is EASY. Translating that into a health bar or hearts requires a "hpmax" variable and additional logic to build out.
Lessons
01: Text story
Example: HowTo-01-PrintText.lua
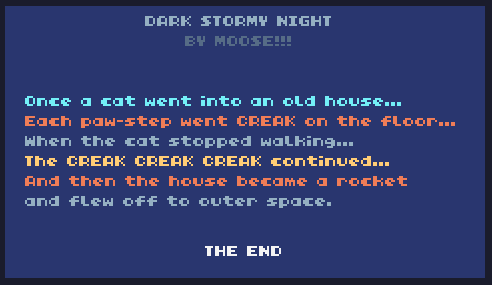
Topics: Tic-80 basics, Print statements
How to use the Tic-80 software and create a little story program!
02: Drawing sprites
Example: HowTo-02-DrawImage.lua
Topic: Sprites, colors, and coordinates
Design some sprites, then draw them to the game screen with the
spr function!
03: Random numbers
Example: HowTo-04-Random.lua
Topics: Random numbers
Learn about placing sprites at random (x,y) coordinates, and generating random numbers within a range to print out.
04: Playing sound effects
Example: HowTo-05-Sounds.lua
Topics: snd function, btn function, if statements
Make a little keyboard program where you press buttons to play notes!
05: Distance formula
Example: HowTo-06-Distance.lua
Topics: Creating a function, the distance formula between two points
Learn about how we can check if two objects are near each other in our game with the distance formula!
06: Moving the player with arrow keys
Example: HowTo-07-KeyMove.lua
Topics: Moving multiple characters with their own (x,y) coordinates, using the arrow keys
07: NPC movement
Example: HowTo-08-NPC.lua
Creating a non-player character that acts on its own. You have to tell it how to behave!
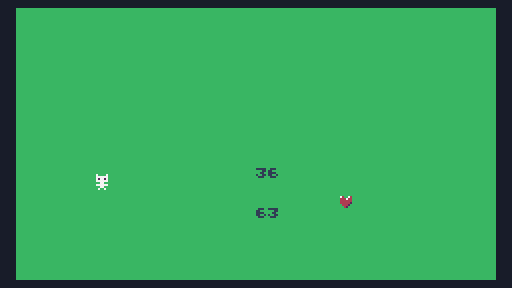
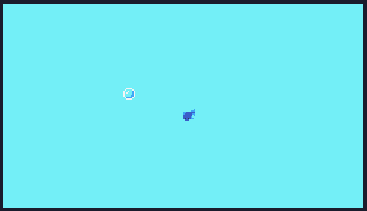
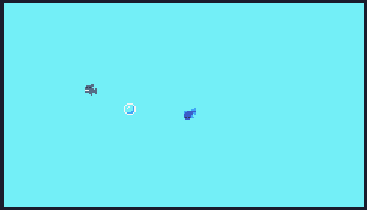
08: Handling collision between two objects
Example: HowTo-09-Collision.lua
Let's add scores for the player and the NPC, whoever collects the bubble gets a point!
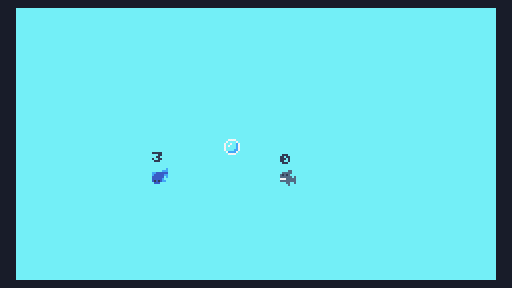
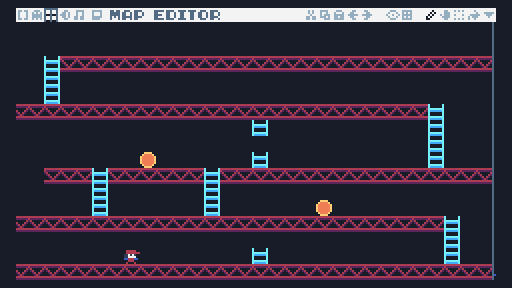
09: How to make a background or game level
Example: HowTo-10-Background.lua
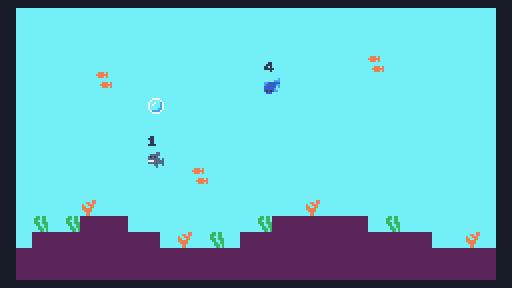
Now that we have the gameplay, let's make the game a little nicer looking!
Use the Map Editor (F3) to create backgrounds, then set the map to
draw in the game code with the map function:
10. Making a title screen / game over screen
Example: HowTo-11-Menus.lua
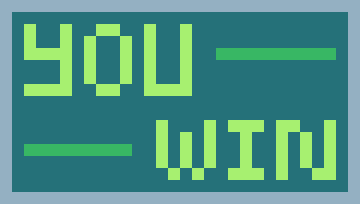
Now we need a title screen, "you win!" screen, and "game over" screen.
You can build basic menus using the Map Editor (F3) and go between
screens by using the map function. You'll also want a separate
variable to keep track of which screen you're on.
screen = 1

function TIC()
  if screen == 1 -- Title screen
    map(0,0)
    if btn(4) then screen = 2 end      -- Start game if player hits "Z"

  elseif screen == 2 -- Game screen
    map(30,0)
    if lives == 0  then screen = 3 end -- Game over if you run out of lives
    if score == 10 then screen = 4 end -- You win if score hits 10
    -- [... More game logic ...]

  elseif screen == 3 -- Game over screen
    map(60,0)

  elseif screen == 4 -- You win screen
    map(90,0)

  end
end
Step-by-step game recipes
🖌️ Paint program
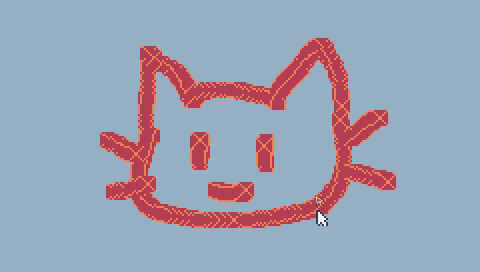
Topics: Mouse coordinates and button click
Learn about how to detect mouse movement and clicks with the
mouse() function!
x, y, button = mouse() -- Get mouse info
🐹 Click-a-mole game
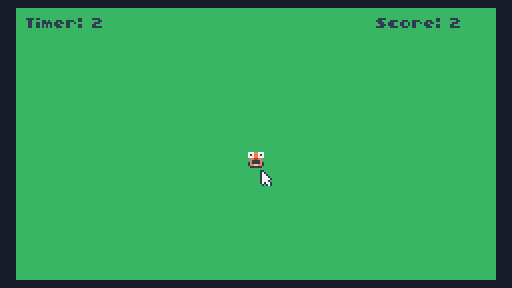
This game will put together everything we've learned so far to make a simple "click-a-mole" game.
Pickin' Sticks

Putting it all together to make a game!
Starter template projects
These projects have some art and some code already provided. Students can continue expanding from there!
Make sure to go into TIC-80 and type folder!
Download the game file and put it in the folder!
Arcade
RPG

How to…
🧽 How do I clear the screen?
clsfunction: https://github.com/nesbox/TIC-80/wiki/clscls([color=0])
cls(colorId) -- Clear the screen
💬 How do I print text to the screen?
printfunction: https://github.com/nesbox/TIC-80/wiki/printprint(text[,x=0][,y=0][,color=15][,fixed=false][,scale=1][,smallfont=false])
print("TEXT", x, y, colorId) -- Draw text at a position
✏️ How do I draw images on the screen?
sprfunction: https://github.com/nesbox/TIC-80/wiki/sprspr(id, x, y, [colorkey=-1], [scale=1], [flip=0], [rotate=0], [w=1], [h=1])
spr(id, x, y, 0)
🖱️ How do I detect mouse clicks and mouse position?
mousefunction: https://github.com/nesbox/TIC-80/wiki/mousemouse() -> x, y, left, middle, right, scrollx, scrolly
Example: HowTo-03-Mouse.lua
mousex, mousey, mousebtn = mouse()
🎲 How do I make random things happen?
randNum = math.random(MIN, MAX)
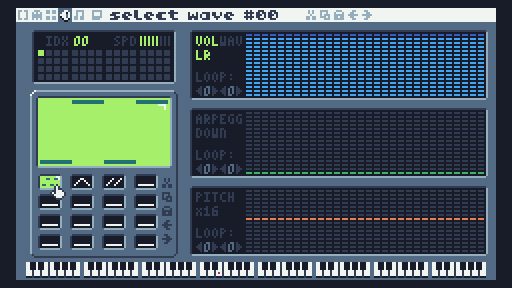
🔊 How do I play sound effects?
sfxfunction: https://github.com/nesbox/TIC-80/wiki/sfxsfx(id, [note=-1], [duration=-1], [channel=0], [volume=15], [speed=0])
sfx(soundId, "C-4", 10) -- Play a sound
🔘 How do I detect button presses?
btnfunction: https://github.com/nesbox/TIC-80/wiki/btnbtn(id) -> isPressed
if btn(0) then
  -- Do some command
end
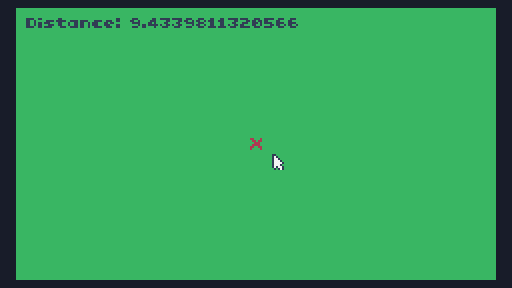
📐 How do I determine how far from each other two things are?
function GetDistance( x1, y1, x2, y2 )
  return math.sqrt( ( x2 - x1 )^2 + ( y2 - y1 )^2 )
end

player={ x=0, y=0 }
item  ={ x=20, y=20 }

function TIC()
  dist = GetDistance(player.x, player.y, item.x, item.y)
  if dist <= 8 then
    -- Collision!
  end
end
➡️ How do I get my character to move when arrow keys are hit?
btnfunction: https://github.com/nesbox/TIC-80/wiki/btnbtn(id) -> isPressed
-- SETUP
player={ x=0, y=0 }

function HandleMovement()
  if     btn(0) then
    player.y=player.y-1

  elseif btn(1) then
    player.y=player.y+1

  elseif btn(2) then
    player.x=player.x-1

  elseif btn(3) then
    player.x=player.x+1

  end
end

-- GAME LOOP
function TIC()
  HandleMovement()

  -- (... more code ...)
end
🏃 How do I make an NPC move on its own?
-- SETUP
npc = { x=0, y=0, goalx=120, goaly=80 }

function NpcMoveTowardGoal()
  if     npc.goalx < npc.x then -- Goal is to the left
    npc.x = npc.x - 1
  elseif npc.goalx > npc.x then -- Goal is to the right
    npc.x = npc.x + 1
  end

  if     npc.goaly < npc.y then -- Goal is above
    npc.y = npc.y - 1
  elseif npc.goaly > npc.y then -- Goal is below
    npc.y = npc.y + 1
  end
end

-- GAME LOOP
function TIC()
  NpcMoveTowardGoal()

  -- (... more code ...)
end
🏓 How do I check if two items are hitting each other?
function GetDistance( x1, y1, x2, y2 )
  return math.sqrt( ( x2 - x1 )^2 + ( y2 - y1 )^2 )
end

-- SETUP
player ={ x=0, y=0, score=0 }
item   ={ x=0, y=0 }

-- GAME LOOP
function TIC()
  dist = GetDistance(player.x, player.y, item.x, item.y)
  if dist <= 8 then
    player.score=player.score+1
  end
end
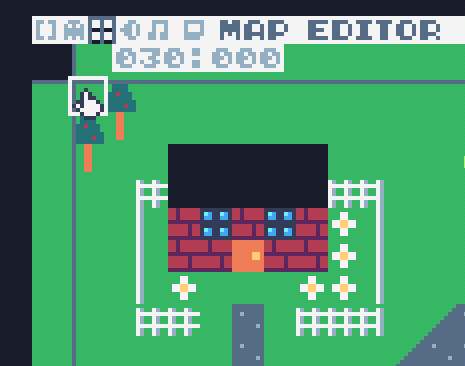
🌌 How do I make a background / a game level?
mapfunction: https://github.com/nesbox/TIC-80/wiki/mapmap([x=0], [y=0], [w=30], [h=17], [sx=0], [sy=0], [colorkey=-1], [scale=1], [remap=nil])
F3 is the MAP EDITOR. Use the eyeball button
 to view all the maps in your game.
The very top-left of the map will be its coordinate that you use.
-- SETUP
mapx = 30; mapy = 0

-- GAME LOOP
function TIC()
    map(mapx, mapy)
end
⏳ How do I make a countdown timer?
Example: HowTo-12-Countdown.lua
-- SETUP
countdown = 0

-- GAME LOOP
function TIC()
  if btn(4) then countdown = 100 end    -- Start countdown timer

  if countdown > 0 then                 -- Countdown timer
   countdown = countdown - 1
  end

  if countdown == 0 then
   -- Do some action once timer is 0
  end
end
🔥 How do I shoot one projectile?
Example: HowTo-13-Projectile.lua
You will need an x,y coordinate for the projectile, as well as velocity x,y values. Also handy to have these for the player, if the projectile is going to travel in the same direction as there the player is moving to.
-- SETUP
player ={ x=0,    y=0,    image=1, velx=0, vely=0 }
bullet ={ x=-100, y=-100, image=2, velx=0, vely=0 }

function HandleMovement()
  player.velx = 0
  player.vely = 0

  if     btn(0) then
    player.y=player.y-1
    player.vely=-1

  elseif btn(1) then
    player.y=player.y+1
    player.vely=1

  elseif btn(2) then
    player.x=player.x-1
    player.velx=-1

  elseif btn(3) then
    player.x=player.x+1
    player.velx=1

  end
end

function HandleShoot()
  if btn(4) and bullet.x==-100 then
    -- Put bullet "on" player to start with
    bullet.x=player.x
    bullet.y=player.y

    -- Set bullet direction
    bullet.velx=player.velx*2
    bullet.vely=player.vely*2
  end
end

function UpdateBullet()
  if bullet.x ~= -100 then        -- Is bullet visible?
    bullet.x=bullet.x+bullet.velx -- Move bullet based on horizontal velocity
    bullet.y=bullet.y+bullet.vely -- Move bullet based on vertical velocity
  end

  -- If it goes off screen, disable bullet
  if bullet.x < -20 or
     bullet.x > 240 or
     bullet.y < -20 or
     bullet.y > 136 then
    bullet.x = -100
  end
end

-- GAME LOOP
function TIC()
  HandleMovement()
  HandleShoot()
  UpdateBullet()

  -- DRAW STUFF
  spr(player.image, player.x, player.y,0)
  spr(bullet.image, bullet.x, bullet.y,0)
end
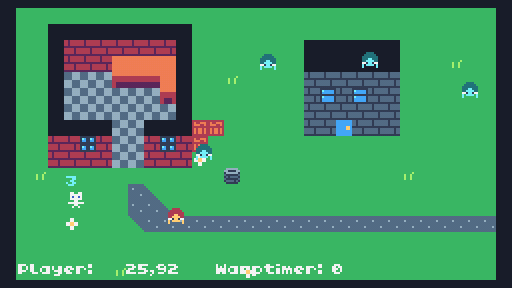
🗺️ How do I make the map scroll?
Example: HowTo-14-MapScroll.lua
You'll have to define when the map should scroll. The game screen is 240 pixels wide by 136 pixels tall. Maps are 30 tiles wide by 17 tiles tall. If the player goes off the screen, then you can adjust the map coordinates.
-- SETUP
mapx=0; mapy=0
player={ x=0, y=0 }
screen={ pxwidth=240, pxheight=136,
         tilewidth=30, tileheight=17 }

function HandleScreenScroll()
  -- Off right side
  if     player.x > screen.pxwidth then
    mapx=mapx+screen.tilewidth   -- Shift map
    player.x = 0                 -- Reset player position

  -- Off left side
  elseif player.x < -8 then
    mapx=mapx-screen.tilewidth   -- Shift
    player.x = screen.pxwidth-8  -- Reset the player position
  end

end

-- GAME LOOP
function TIC()
  map(mapx, mapy) -- Draw current map

  HandleScreenScroll()

end
↩️ How do I make my character turn when moving?
Example: HowTo-15-Directions.lua
You will need a sprite for each direction. You will also need a variable to store which sprite image to use When the button for a direction is pressed, move the character, but also set its sprite to the correct direction.

-- SETUP
player={
  x=0, y=0,
  image=256,
  images={
    up=256,
    down=257,
    left=258,
    right=259
  }
}

function HandleMovement()
  if     btn(0) then
    player.y=player.y-1
    player.image=player.images.up

  elseif btn(1) then
    player.y=player.y+1
    player.image=player.images.down

  elseif btn(2) then
    player.x=player.x-1
    player.image=player.images.left

  elseif btn(3) then
    player.x=player.x+1
    player.image=player.images.right

  end
end

-- GAME LOOP
function TIC()
  HandleMovement()

  spr(player.image, player.x, player.y, 0)
end
🎬 How do I animate my sprites?
Example: HowTo-16-Animated.lua
You will need a sprite for each frame. You will also need a variable to store which frame of animation you're on (and ideally the max amount of frames). Each game cycle, add to the frame number, and use this to adjust your sprite each time.

-- SETUP
player={
  x=0, y=0,
  frame=0, frameMax=2,
  image=256,
  images={
    up=256,
    down=257,
    left=258,
    right=259
  }
}

function UpdateAnimation()
  player.frame=player.frame + 0.1          -- Increment animation frame
  if player.frame >= player.frameMax then
    player.frame=0                         -- Reset back to 0 at the end
  end
end

-- GAME LOOP
function TIC()
  spr(player.image + math.floor(player.frame), player.x, player.y, 0)
end
This code assumes your frames of animation will be next to each other horizontally. If you're adding multiple sprites for different DIRECTIONS, put those vertically.
🐘 How do I make big sprites?
Example: HowTo-18-BigSprite.lua
PLEASE DON'T DO THIS IT IS A PAIN IN THE BUTT AND MAKES COLLISION, ANIMATION, AND EVERYTHING ELSE HARDER!!
If your sprite is one block, you just need one spr call:
![]()
spr(player.image, player.x, player.y, 0)
If your sprite is 2x2 blocks, you will need a spr for each part:
![]()
-- SETUP
player={
  x=0, y=0,
  bigimage={
    { i=0,  x=-4, y=-4 },
    { i=1,  x= 4, y=-4 },
    { i=17, x=-4, y= 4 },
    { i=18, x= 4, y= 4 },
  }
}

-- GAME LOOP
function TIC()
  for id, sp in pairs( player.bigimage ) do
    spr( sp.i, player.x+sp.x, player.y+sp.y, 0 )
  end
end
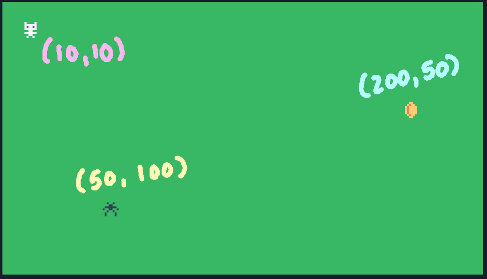
👾👾 How do I handle multiple enemies?
See program: example-code/AllFeatures.lua
We will need to use tables, which have { }. For example, this set
of enemies has TWO enemies created inside it. This is before the
TIC() function:
-- SETUP
enemies = {
  { mapx=0,  mapy=0, x=50, y=100, image=193, spd=0.5, alive=true },
  { mapx=30, mapy=0, x=150, y=70, image=193, spd=0.5, alive=true }
}
Within the TIC() function we can use a for loop to work with all the enemies while only writing code once:
-- HANDLE ARRAY OF ENEMIES -----------
for id,en in pairs(enemies) do
  if en.alive == true then
    -- Only use enemy if it's on the current map
   if mapx == en.mapx and mapy == en.mapy then
     spr(en.image, en.x, en.y,0)
   end
  end
end
We can also add enemy movement (like chase the player), also within the for loop:
-- HANDLE ARRAY OF ENEMIES -----------
for id,en in pairs(enemies) do
  if en.alive == true then
    -- Only use enemy if it's on the current map
    if mapx == en.mapx and mapy == en.mapy then
      spr(en.image, en.x, en.y,0)

      -- Chase player
      if     player.x < en.x then
        en.x = en.x - en.spd
      elseif player.x > en.x then
        en.x = en.x + en.spd
      elseif player.y < en.y then
        en.y = en.y - en.spd
      elseif player.y > en.y then
        en.y = en.y + en.spd
      end
    end
  end
end
Or checking for collision:
-- HANDLE ARRAY OF ENEMIES -----------
 for id,en in pairs(enemies) do
   if en.alive == true then
     -- Only use enemy if it's on the current map
     if mapx == en.mapx and mapy == en.mapy then
       spr(en.image, en.x, en.y,0)

       -- Chase player
       if     player.x < en.x then
         en.x = en.x - en.spd
       elseif player.x > en.x then
         en.x = en.x + en.spd
       elseif player.y < en.y then
         en.y = en.y - en.spd
       elseif player.y > en.y then
         en.y = en.y + en.spd
       end

       -- Check for collision
       if GetDistance(player.x,player.y,en.x,en.y) <= 8 then
         -- Bump player
         player.x = player.x + math.random(-1,1)
         player.y = player.y + math.random(-1,1)

         if hurttimer == 0 then
           -- Player gets hurt
           player.health = player.health - 1
           player.hurttimer = 100
           sfx(0,"C-4",10)
         end
       end
     end
   end
 end

 -- Hurt timer countdown
 if player.hurttimer > 0 then
   player.hurttimer = player.hurttimer - 1
 end
💣💣 How do I shoot multiple projectiles?
See program: example-code/AllFeatures.lua
You will need a table for bullets, just like the table of enemies. However, we will only shoot bullets when the player presses a button. This goes within the TIC() function:
-- HANDLE ARRAY OF BULLETS -----------
-- Create bullets if shooting
if btn(4) and bullettimer == 0 then
  newbullet={}
  newbullet.x = x
  newbullet.y = y
  newbullet.velx = velx
  newbullet.vely = vely
  newbullet.img = 208
  newbullet.spd = 2
  table.insert(bullets,newbullet)
  bullettimer = 10
end
if bullettimer > 0 then
  bullettimer = bullettimer - 1
end
Inside the TIC() function we need to make sure to handle those bullets.
 for id,bul in pairs(bullets) do
  -- Update bullet
  bul.x = bul.x + bul.velx * bul.spd
  bul.y = bul.y + bul.vely * bul.spd

  -- Draw bullet
  spr(bul.img,bul.x,bul.y,0)

  -- Check collision against enemies
  for eid, en in pairs(enemies) do
    if en.mapx==mapx and en.mapy==mapy then
      if GetDistance(en.x, en.y, bul.x, bul.y) <= 8 then
        en.alive = false
      end
    end
  end
end
🪄 How do I create spot-warps to other rooms?
See program: example-code/AllFeatures.lua
This is hard to do mostly because you have to keep track of map TILES and PIXEL coordinates. I would recommend just doing the screen scrolling "warping" instead of having a specific tile warp elseware.
We will need to create our warp list in a table above the TIC() function:
warps = {
  {
    mapxA=0, mapyA=0,   xA=20*8, yA=7*8,
    mapxB=0, mapyB=119, xB=6*8,  yB=80
  },
}
warptimer=0
And then check each warp in the TIC() function:
-- CHECK FOR WARPS -------------------
if warptimer == 0 then
  for id,wp in pairs(warps) do
    -- A to B warp
    if mapx==wp.mapxA and mapy==wp.mapyA then
      if GetDistance(x, y, wp.xA, wp.yA) <= 7 then
        -- Warp to new location
        mapx = wp.mapxB; mapy = wp.mapyB
        x    = wp.xB;    y    = wp.yB
        warptimer = 100
      end
    -- B to A warp
    elseif mapx==wp.mapxB and mapy==wp.mapyB then
      if GetDistance(x, y, wp.xB, wp.yB) <= 7 then
        -- Warp to new location
        mapx = wp.mapxA; mapy = wp.mapyA
        x    = wp.xA;    y    = wp.yA
        warptimer = 100
      end
    end
  end
elseif warptimer > 0 then
  warptimer = warptimer - 1
end -- if warptimer == 0 then
⛔ How do I disallow the player from moving into certain tiles?
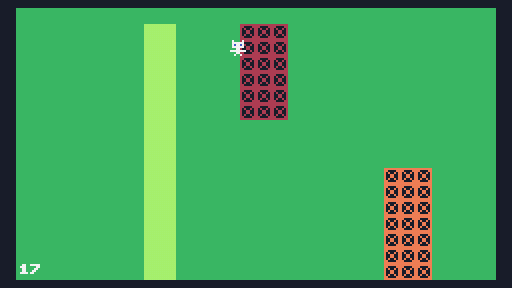
See program: example-code/HowTo-BlockTiles.lua
We will need to define which tiles we DON'T want the player to move on. We can do this with a table before the TIC() function:
-- SETUP
-- Mark which tiles we can't walk on
nowalk = { 1, 2 }
For this we will have to first predict where the player is moving. Rather than moving them when an arrow key is pressed, we instead do some math to figure out where they're going to go if everything is OK:
function HandleMovement()
  movex=player.x
  movey=player.y

  if     btn(0) then
    movey=player.y-1

  elseif btn(1) then
    movey=player.y+1

  elseif btn(2) then
    movex=player.x-1

  elseif btn(3) then
    movex=player.x+1

  end
end
Next we have to look at what tile is in this spot. We look through
all the entries in the nowalk list, and if there's a match, we say
"no, you cannot walk":
function HandleMovement()
  movex=player.x
  movey=player.y

  if     btn(0) then
    movey=player.y-1

  elseif btn(1) then
    movey=player.y+1

  elseif btn(2) then
    movex=player.x-1

  elseif btn(3) then
    movex=player.x+1

  end

  tilehere=mget(mapx+movex/8,mapy+movey/8)
  canwalk=true
  for id,badtile in pairs(nowalk) do
    if tilehere == badtile then
      canwalk=false
    end
  end
end
If you can walk, then we can change the player's (x,y) coordinates:
if canwalk then
 player.x = movex
 player.y = movey
end
This will look best if we also offset the player's sprite to be drawn at its center-point instead of its edge:
spr(player.image,player.x-4,player.y-4,0)
Note: This is one of the locations where using a sprite that is multiple tiles wide/tall will make this computation work less well.
💣🧙 How do I deal with collision between a projectile and an object?
function GetDistance( x1, y1, x2, y2 )
  return math.sqrt( ( x2 - x1 )^2 + ( y2 - y1 )^2 )
end

-- SETUP
player={x=0, y=0,  image=1, hp=5, alive=true}
enemy ={x=10,y=10, image=2, hp=5, alive=true}
bullet={x=5, y=5}

function HandleBullet()
  if GetDistance(bullet.x, bullet.y, player.x, player.y) <= 8 then
    player.hp=player.hp-1        -- Damage player
    bullet.x=-100; bullet.y=-100 -- Remove the bullet
  end

  if GetDistance(bullet.x, bullet.y, enemy.x, enemy.y) <= 8 then
    enemy.hp=enemy.hp-1          -- Damage enemy
    bullet.x=-100; bullet.y=-100 -- Remove the bullet
  end
end

-- GAME LOOP
function TIC()
  if player.alive then -- Only draw player if alive
    spr(player.image, player.x, player.y, 0)
  end

  if enemy.alive then -- Only draw enemy if alive
    spr(enemy.image, enemy.x, enemy.y, 0)
  end
end
Additional code - Enemies and Warp systems
-- HELPER FUNCTIONS ------------------------------

function IsOnThisMap( obj )
  return obj.mapX == mapx and obj.mapY == mapy
end

function GetDistance( x1, y1, x2, y2 )
  return math.sqrt( ( x2 - x1 )^2 + ( y2 - y1 )^2 )
end

-- DEBUG -----------------------------------------

function Debug( title, thing, x, y, level )
  print( title .. ": " .. type(thing), x + (level*8), y)
  if thing == nil then
    return
  end
  for key, value in pairs( thing ) do
    y = y + 8
    if type( value ) == "table" then
      Debug( key, value, x + (level*8), y, level+1 )
    else
      print( key .. "=" .. value, x + (level*8), y )
    end
  end
end

function Debug2()
  print( "MAP: " .. mapx .. "," .. mapy, 2, 128 )
  print( "PLAYER: " .. x .. "," .. y, 50, 128 )
end

-- WARP HANDLER ----------------------------------
warps = {}
warptimer = 0

function CreateWarp( tile1X, tile1Y, tile2X, tile2Y )
  newWarp = {}
  newWarp.tileX = tile1X
  newWarp.tileY = tile1Y
  newWarp.mapX = math.floor( newWarp.tileX / 30 ) * 30
  newWarp.mapY = math.floor( newWarp.tileY / 16 ) * 16
  newWarp.x = (newWarp.tileX - newWarp.mapX)*8
  newWarp.y = (newWarp.tileY - newWarp.mapY)*8

  newWarp.tileDestX = tile2X
  newWarp.tileDestY = tile2Y
  newWarp.mapDestX = math.floor( newWarp.tileDestX / 30 ) * 30
  newWarp.mapDestY = math.floor( newWarp.tileDestY / 16 ) * 16
  newWarp.xDest = (newWarp.tileDestX - newWarp.mapDestX)*8
  newWarp.yDest = (newWarp.tileDestY - newWarp.mapDestY)*8

  table.insert( warps, newWarp )
end

function HandleWarps()
  if warptimer == 0 then
    for id, wp in pairs( warps ) do
      if IsOnThisMap( wp ) then
        if GetDistance( x, y, wp.x, wp.y ) <= 8 then
          mapx = wp.mapDestX; mapy = wp.mapDestY
          x = wp.xDest; y = wp.yDest
          warptimer = 100
        end
      end -- IsOnMap
    end -- for
  elseif warptimer > 0 then
    warptimer = warptimer - 1
  end -- warptimer
end -- function

-- ENEMY HANDLER ---------------------------------
enemies = {}

function CreateEnemy( mapX, mapY, tileX, tileY, health, imgTopLeft, imgTopRight, imgBottomLeft, imgBottomRight )
  newEnemy = {}
  newEnemy.mapX = mapX
  newEnemy.mapY = mapY
  newEnemy.tileX = tileX
  newEnemy.tileY = tileY
  newEnemy.x = (tileX - mapX) * 8
  newEnemy.y = (tileY - mapY) * 8
  newEnemy.health = health
  newEnemy.imgTopLeft = imgTopLeft
  newEnemy.imgTopRight = imgTopRight
  newEnemy.imgBottomLeft = imgBottomLeft
  newEnemy.imgBottomRight = imgBottomRight
  table.insert( enemies, newEnemy )
end

function UpdateEnemies()
  for id, en in pairs( enemies ) do
    if IsOnThisMap( en ) then
      -- Enemy behavior
    end
  end
end

function DrawEnemies()
  for id, en in pairs( enemies ) do
    if IsOnThisMap( en ) then
      spr( en.imgTopLeft,     en.x-4, en.y-4, 0 )
      spr( en.imgTopRight,    en.x+4, en.y-4, 0 )
      spr( en.imgBottomLeft,  en.x-4, en.y+4, 0 )
      spr( en.imgBottomRight, en.x+4, en.y+4, 0 )
      print( en.health, en.x, en.y - 8 )
    end
  end
end

-- SETUP -----------------------------------------
--           MAPX  MAPY  TILEX  TILEY  HEALTH  SPR1  SPR2  SPR3  SPR4
CreateEnemy( 0,    0,    1,     1,     3,      13,   14,   29,   30 )
CreateEnemy( 30,   0,    34,    4,     3,      13,   14,   29,   30 )

--          TILE1X, TILE1Y, TILE2X, TILE2Y
CreateWarp( 57,     9,      62,     10 )
Make sure to call this within TIC():
UpdateEnemies()
DrawEnemies()
HandleWarps()
Surf: Exploring Games on Tic-80
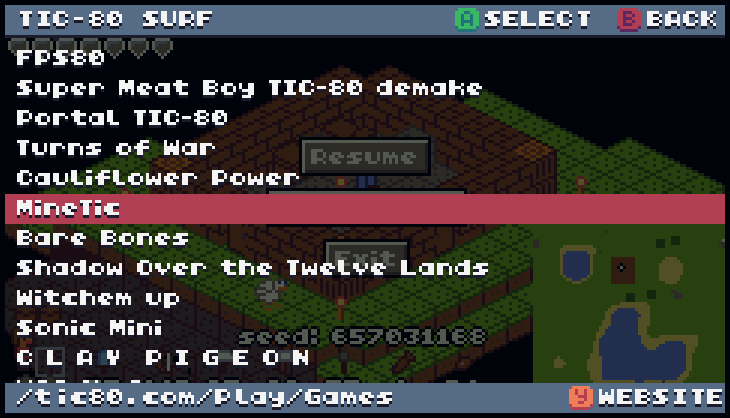
If you have extra time at the end of class, you can go to the PROMPT view in Tic-80 and type in surf. From the menu, select [tic80.com], then [Play], then [Games]. Here, you can try out a bunch of games that other people have made for the Tic-80!
Teacher/parent resources
Lessons/projects files
- TIC-80 - You can download TIC-80 for Windows for free, it is just one file. Place it on the desktop.
- Project files -
Starter code and example code files.
When you run TIC-80, type
folderand hit enter. The project files should be extracted in that directory.
Extra
- Moos-a-dee games -
Instead of letting the students go on gaming websites I allow them
to either play TIC-80 games (via the
surfcommand) or play games that I made. These games are free, feel free to distribute.
More example code
(Need the $10 pro version to open these in Tic-80, but you can view the source code just fine.)
Clicking the file will show you the source code, or you can
right-click and SAVE AS, save it into the TIC-80 folder (type
folder from the TIC-80 prompt!) to be able to load it in the program.
Contact information
You can reach the author of this material at
rsingh13 AT jccc DOT edu.